
You might be surprised to learn that making ribs on the Blackstone is an easy method for tender, flavorful barbecue. We all know that ribs thrive in more traditional environments, such as our Traeger 2-2-1 Ribs, but cooking them on your Blackstone griddle is a game-changing hack that’s especially valuable when you’re short on time.
Prep work is generally the same for Blackstone ribs. You season them exactly how you prefer and wrap them in aluminum foil. The main difference when it comes to the Blackstone is that part way through cooking, you remove the ribs from the foil, spritz them with apple cider vinegar, and grill them directly on the griddle to finish them up. The result is a rack of delicious ribs with a nice bite and an incredible sear. Use the tips and tricks below to make the most of your experience cooking ribs on the Blackstone!

Why You Should Try Ribs on the Blackstone
- Caramelization: The Blackstone is able to beautifully caramelize the ribs in two ways. First, the brown sugar in the dry rub creates a mouthwatering crust. Then, once you add your favorite barbecue sauce, the griddle caramelizes that as well for a sticky and flavorful glaze. This double dose of caramelization creates an irresistible depth of flavor that you won’t be able to get enough of.
- Portability: While a smoker makes undeniably delicious ribs, when it comes to portability and versatility, your Blackstone is the clear winner. If you plan to go camping, for example, and can only bring one outdoor cooking appliance, a Blackstone will allow you to cook a wider variety of meals that will span across your entire trip. This expansion of menu options will make for a more enjoyable experience every time you cook and more importantly, every time you eat.
- Easy clean-up: The clean-up after cooking ribs on the Blackstone is easier than you might think. If your griddle is seasoned properly, it’s unlikely there will be excessive sticking. Because of this, the clean-up won’t be any more significant than if you were grilling chicken thighs or smash burgers. In some ways, the cleaning process is easier than a grill because you won’t have to scrub both sides of the grate or deal with charcoal and pellet residue.
Tips and Tricks for Making Blackstone Ribs
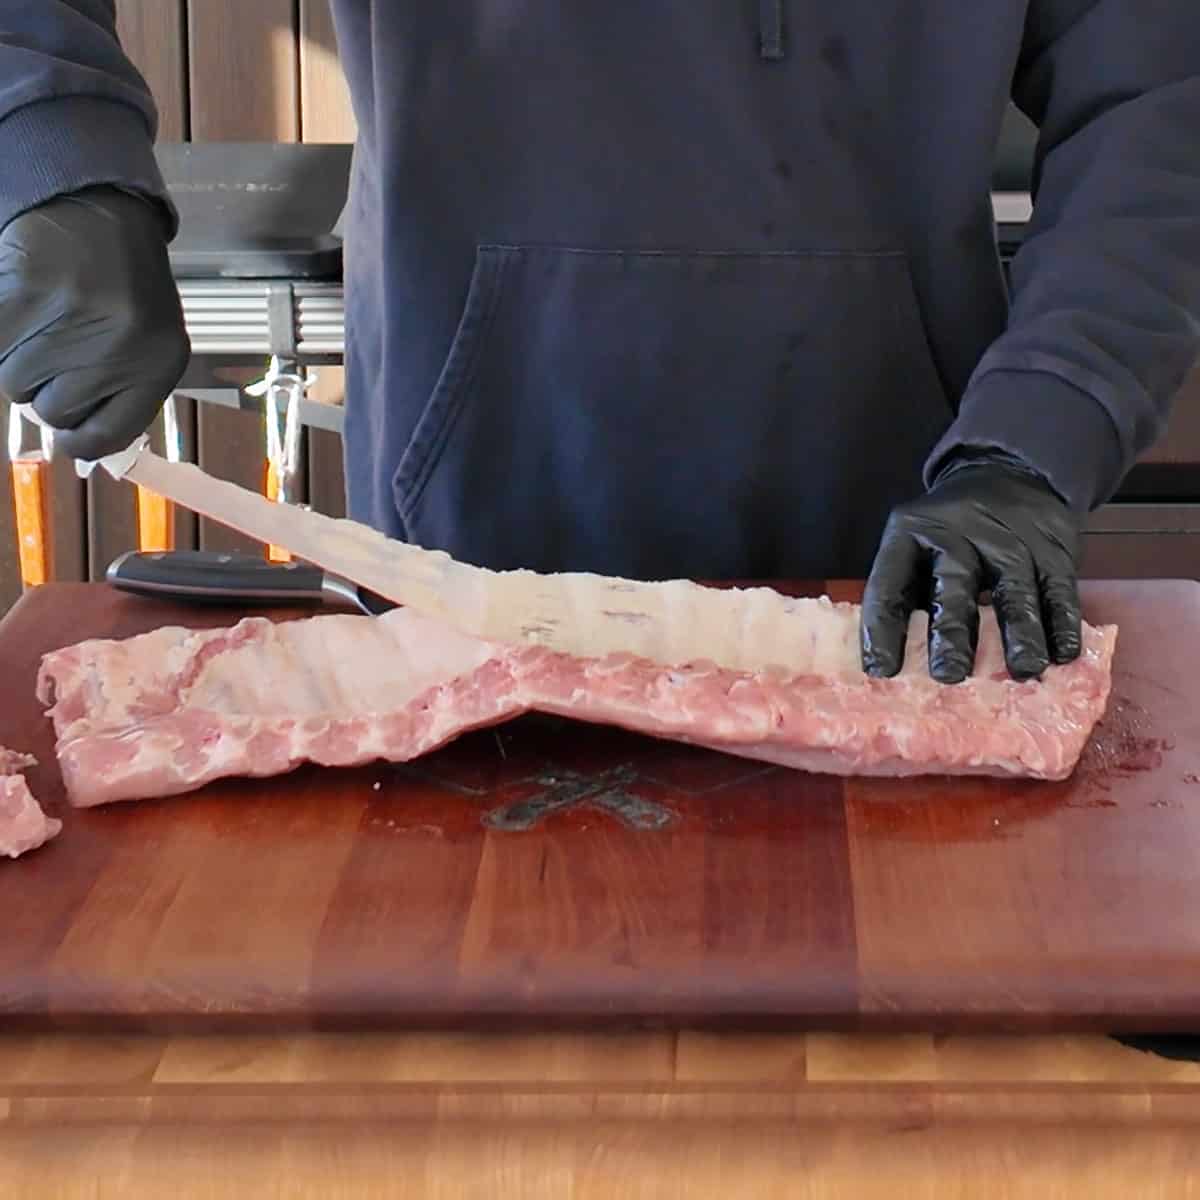
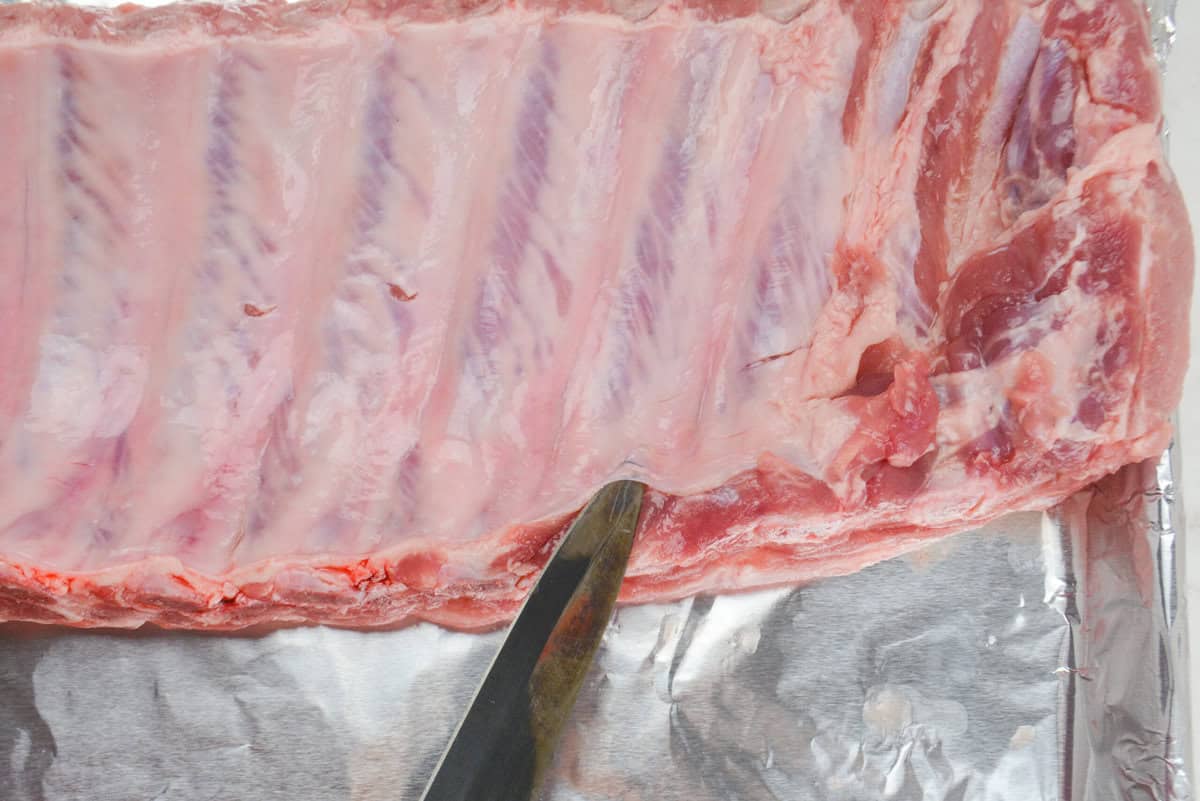
- Use a paring knife to cut the membrane: The membrane on the underside of the ribs can be thick. In some racks, it can be pulled off easily. In others, it requires more work. Working a small, thin knife underneath the membrane can help loosen it for easier removal.
- Let rest before cooking: Place the ribs on the counter for no more than 30 minutes before cooking. This will help bring them to room temperature so they can cook more evenly.
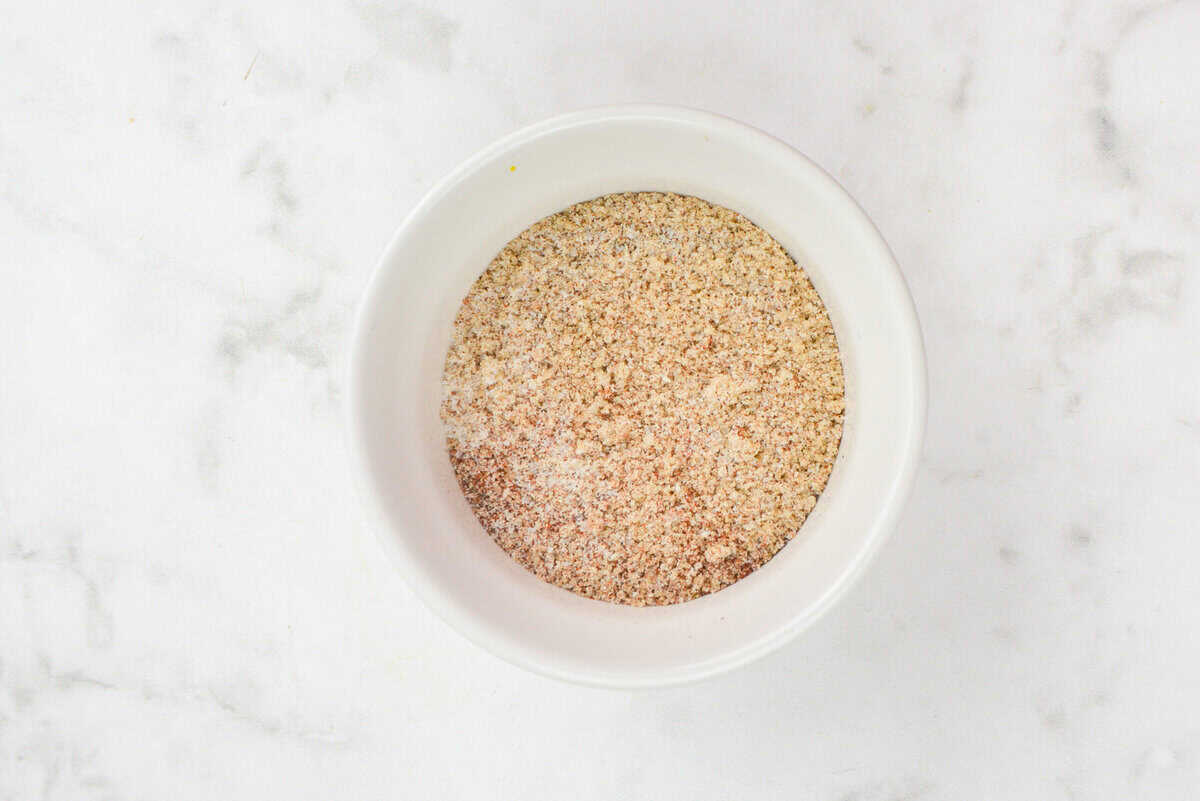
- Use a premade dry rub: If you have a favorite BBQ dry rub, feel free to break it out for this recipe. Be sure to note if the rub includes salt or not so that you can adjust the amount of added salt to your liking.
- Broil them: To get a dark caramelized coating on the ribs, the oven broiler is ideal. Place the cooked ribs onto a foil-lined baking sheet. You can cut them into individual pieces or leave the rack whole. Broil on high for 4-5 minutes until the barbecue sauce begins to turn dark brown and the edges appear dark in color.
Everything You Need to Make These Blackstone Ribs
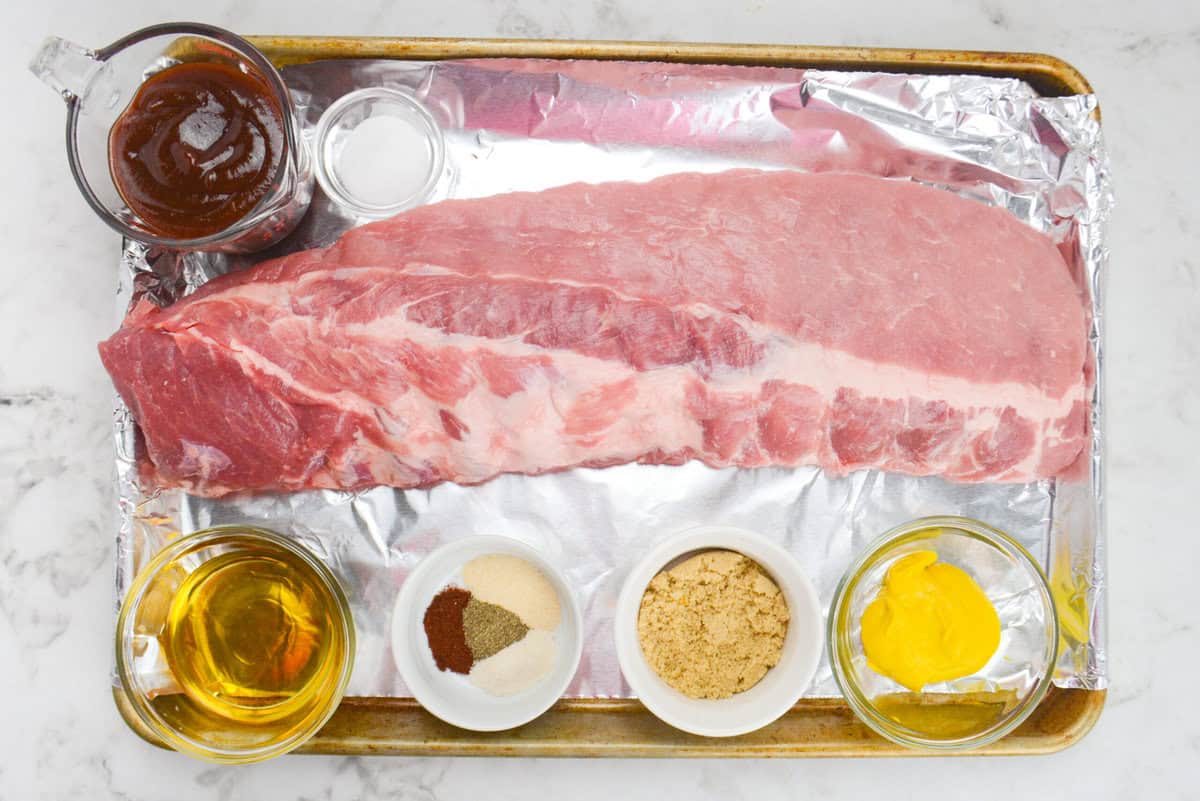
- 2 1/2 pounds Baby Back Ribs: For this recipe, I used Baby Back Ribs, but you can also use St. Louis Style or Country Style with very few changes. Just be sure to adjust the cooking time based on the thickness of the ribs you use and check their internal temperature frequently.
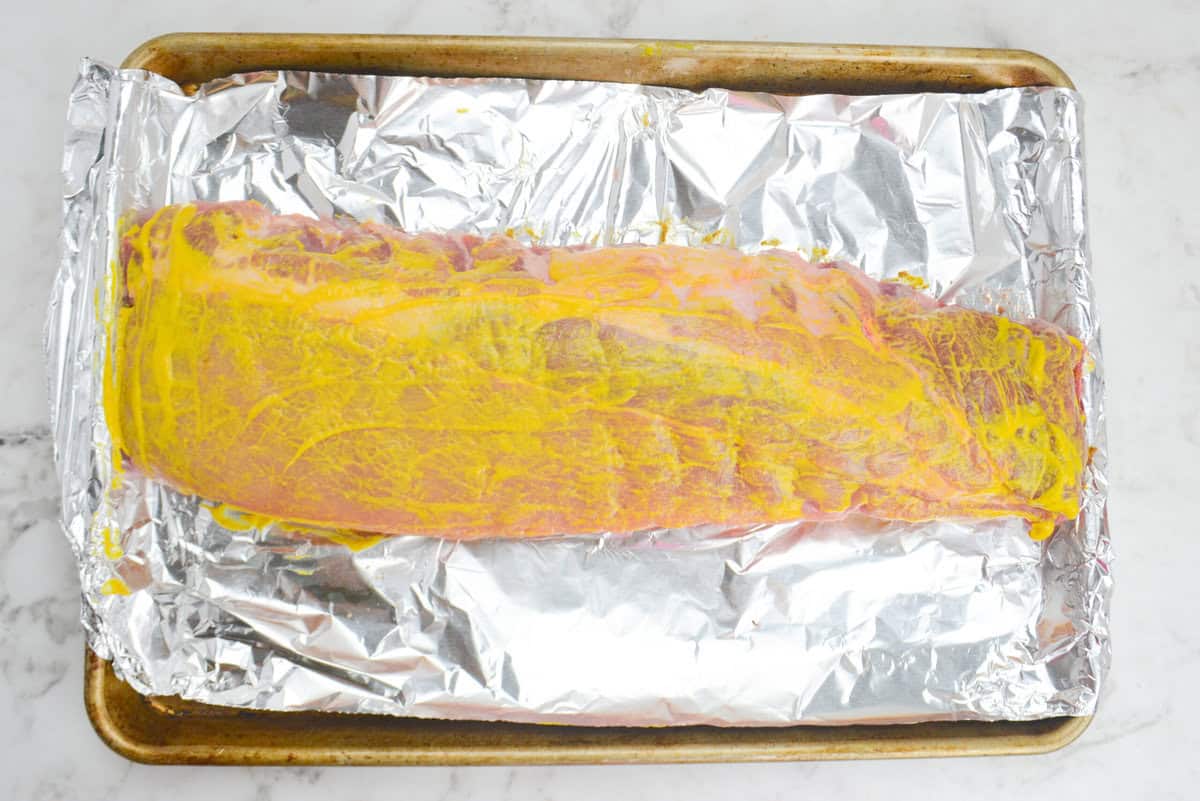
- 2 tablespoons yellow mustard: Yellow mustard adds a tangy taste to the ribs and helps the dry seasoning to stick better. It also seals in moisture so that the thinner parts of the ribs don’t dry out while the thickest parts of the rack come to temperature.
- 2 tablespoons brown sugar: Brown sugar adds a sweetness that complements the smoky spices in the seasoning and sauce.
- 1 teaspoon Smoked paprika: Smoked paprika adds a kick to the seasoning without being overwhelmingly spicy. For a milder version, swap it out for regular paprika.
- 1 teaspoon Onion Powder: Diced onions can burn easily on the Blackstone. Incorporating onion powder is an excellent way to impart their flavor thoroughly without risking small burned pieces.
- 1 teaspoon Garlic salt: Garlic salt adds a touch of umami and complements the other ingredients in the rub.
- 2 teaspoons sea salt: Sea salt enhances the flavor of the ribs and balances the sweet-heat flavors.
- 1/2 teaspoon ground black pepper: Pepper adds depth to the ribs for a more savory and slightly spicier bite.
- 1/4 cup apple cider vinegar: Spraying the ribs with apple cider vinegar helps lock in moisture and tenderizes the meat.
- 1/2 cup barbecue sauce: Generously brushing the cooked ribs with sauce gives them lots of flavor and allows for greater customization based on your preferences.
Step 1: Preheat and make the spice rub
Preheat the Blackstone to low. In a small bowl, mix together the brown sugar, paprika, onion powder, garlic salt, sea salt, and ground black pepper. Set aside.
Step 2: Remove the membrane
Remove the thick white membrane from the underside of the ribs. Loosen it carefully with a knife as needed. Once loosened, pull it away from the rack and discard.
Step 3: Coat in mustard
On a foil-lined baking sheet, spread the mustard evenly on all sides of the ribs.
Step 4: Add the dry rub
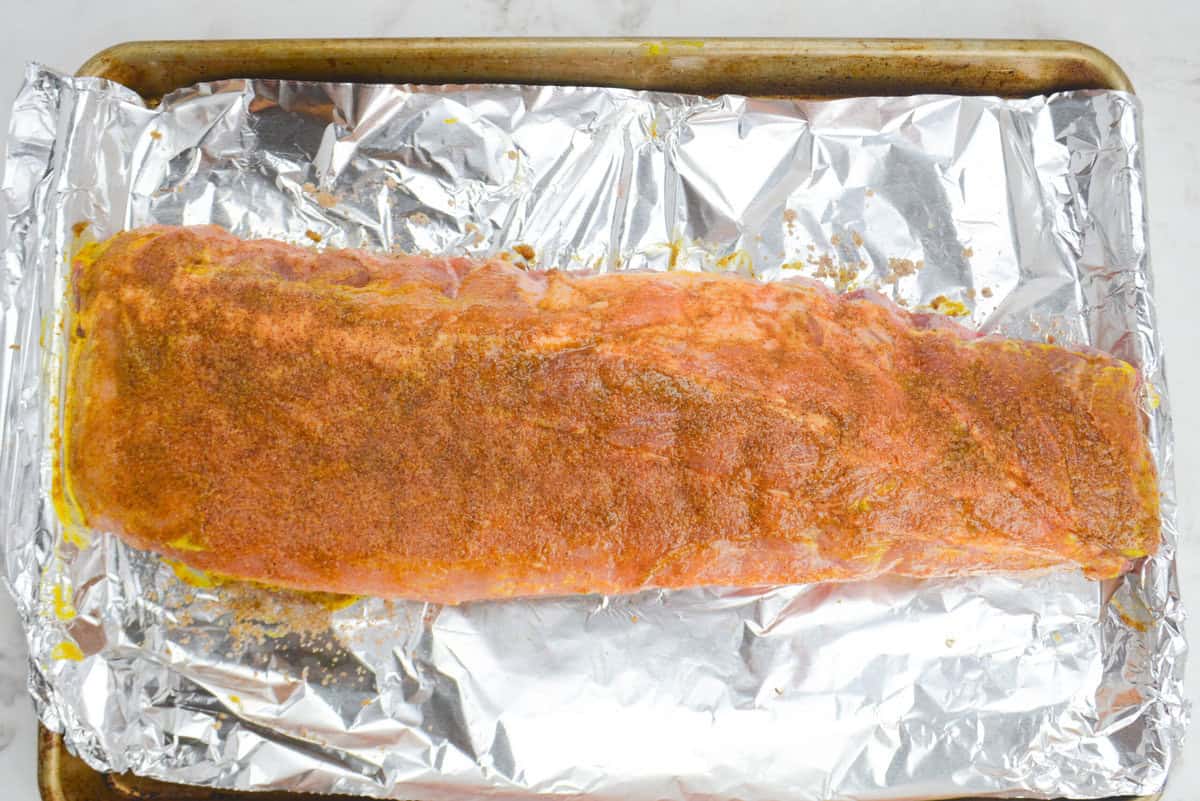
Generously sprinkle the spice mixture onto each side of the ribs. Rub into the ribs, ensuring the edges are coated.
Step 5: Wrap in foil
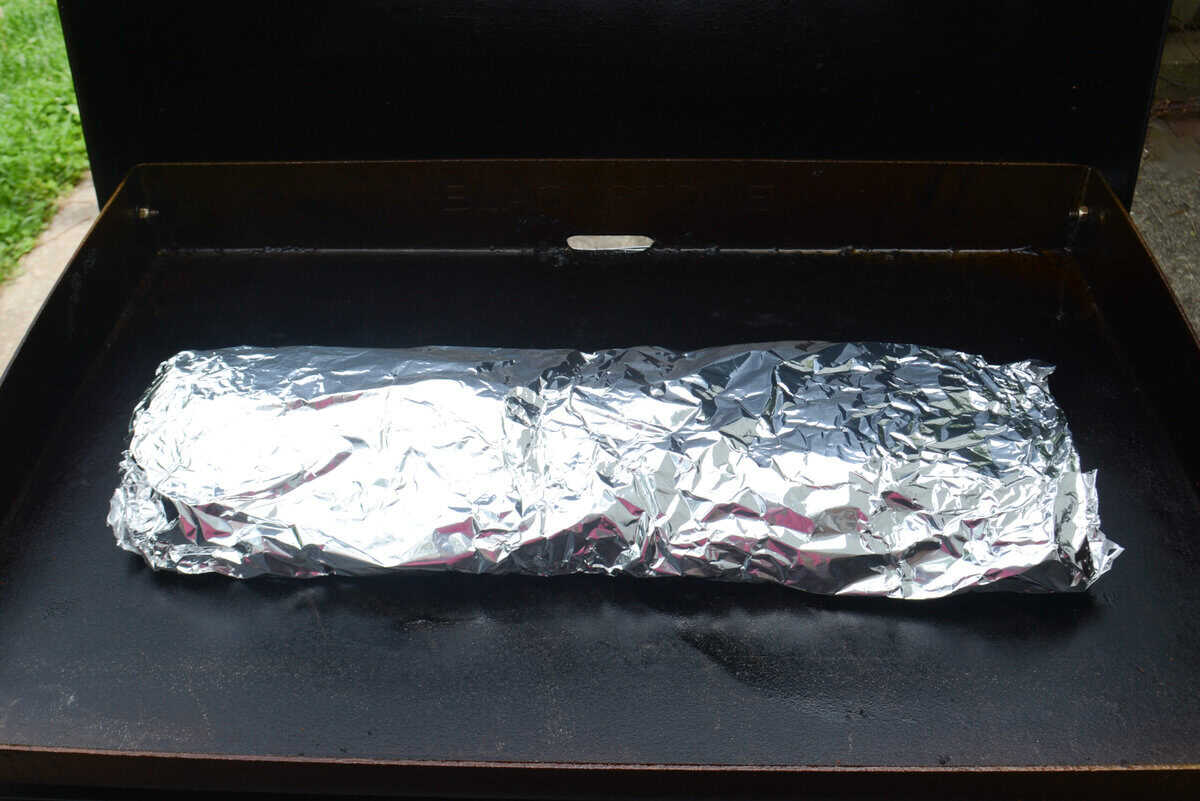
Wrap the ribs in the foil tightly and place them onto the Blackstone with the bone-side down. Close the lid and allow to cook for 30-45 minutes.
Step 6: Cook to temperature
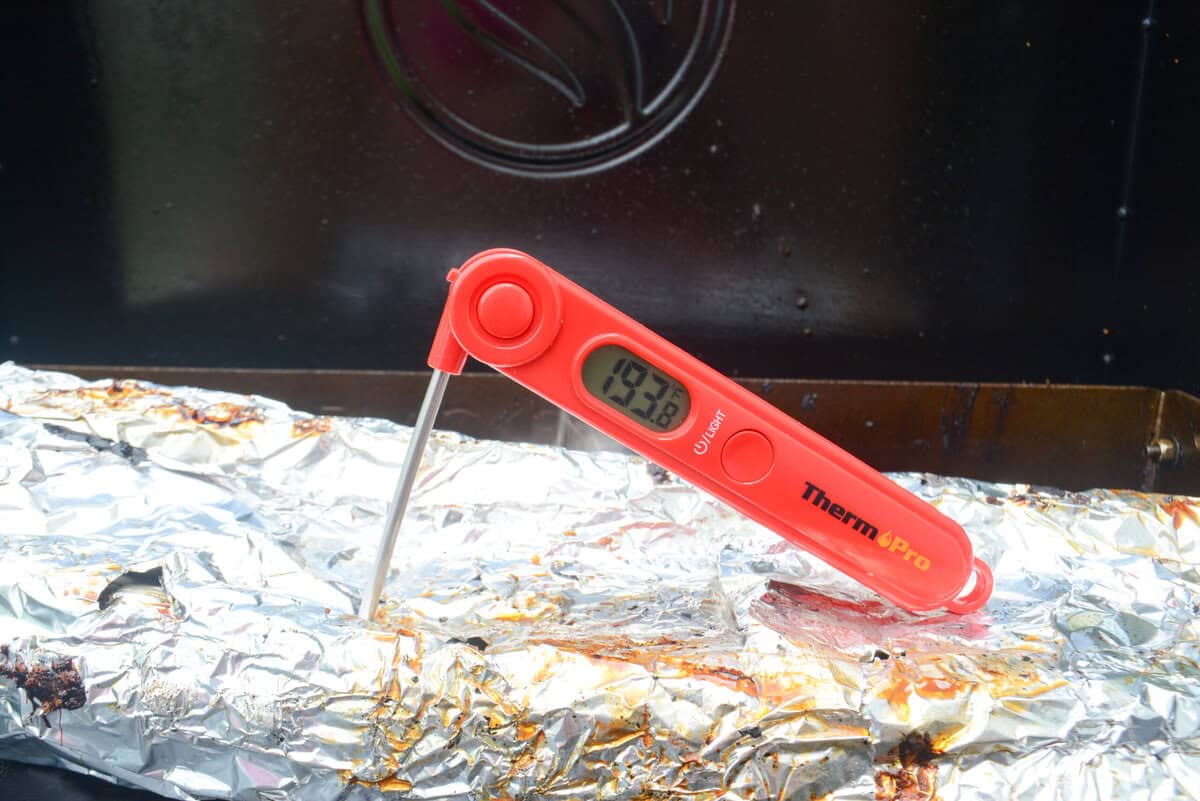
Carefully flip the foil package over and cook for an additional 15-20 minutes until the internal temperature is between 190°F-200°F.

Step 7: Sear the ribs
Increase the heat to medium. Remove the foil from the ribs and sear on each side for 5-10 minutes until browned. You may need to press down on the very edges of the ribs to ensure they make contact with the flat top.
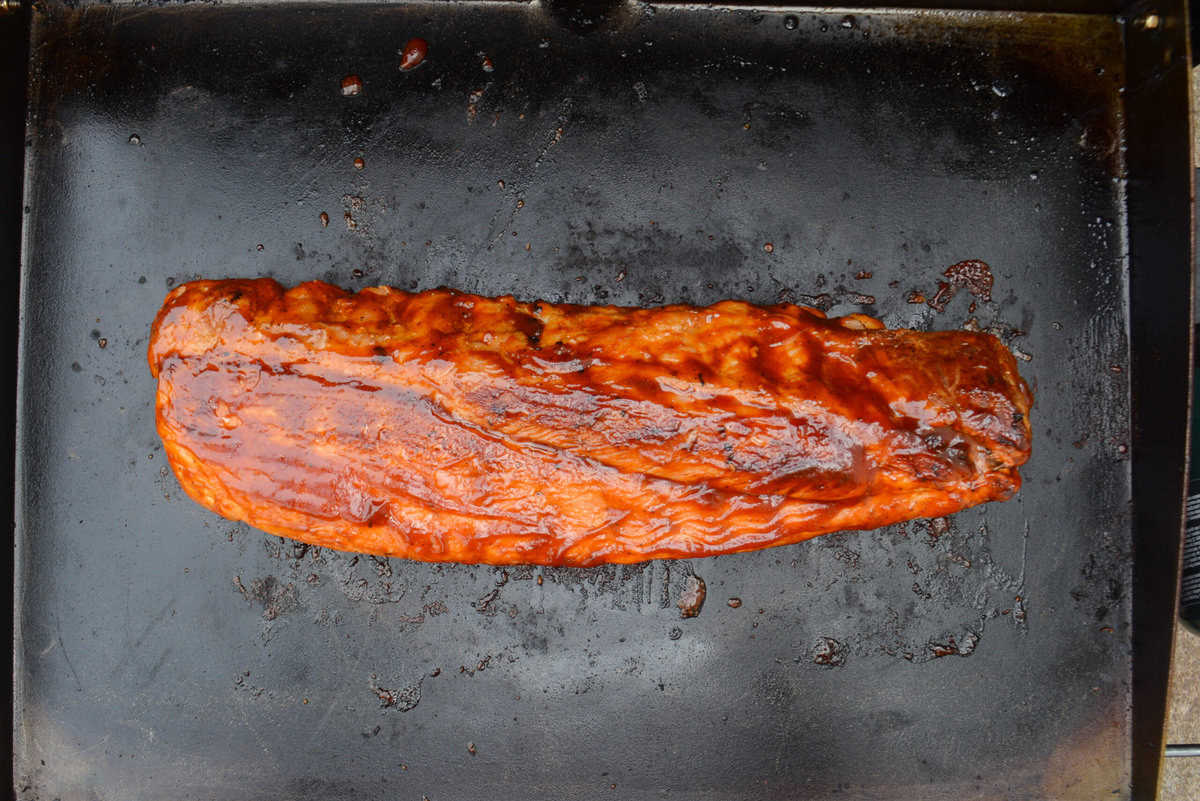
Step 8: Caramelize
Brush each side generously with barbeque sauce. Then, turn and allow each side to be seared with the sauce for 2-3 minutes until it begins to caramelize.
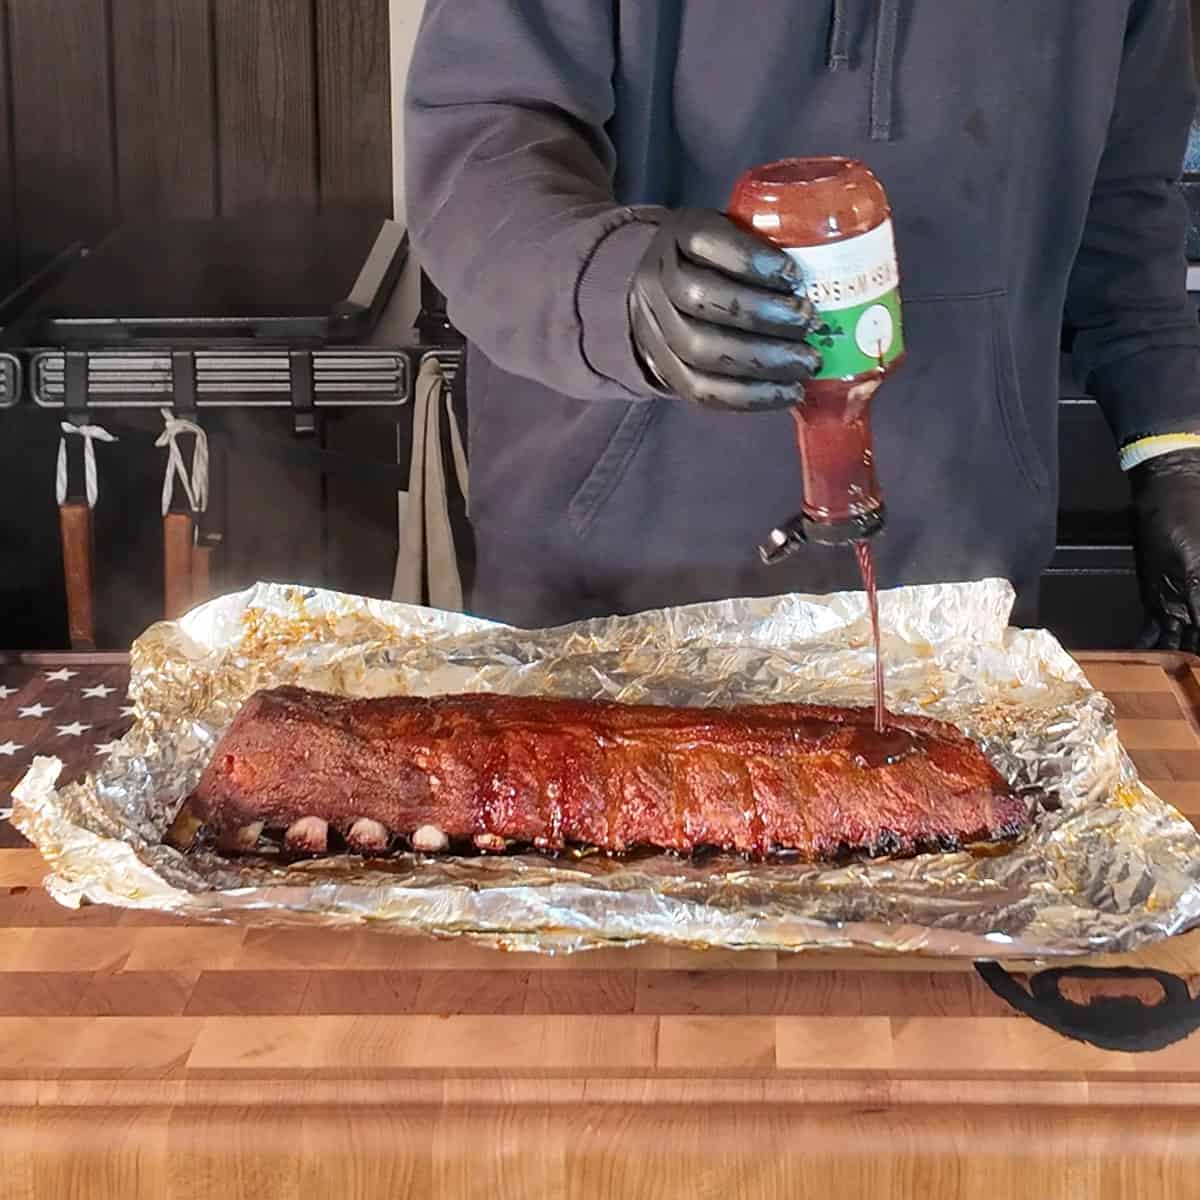
Step 9: Add the sauce
Next, brush more sauce over each side of the ribs as desired. Then rest, serve and enjoy!
Variations and Substitutions
- Add some spice: If you love spicy ribs, try adding crushed red pepper, chili powder, or a pinch of cayenne to the dry rub. These seasonings can quickly kick things up a notch, so be sure to use a small amount at a time. Your favorite spicy barbecue sauce is another great way to layer on the heat.
- Switch up your BBQ style: Whisk together 1/4 cup of brown sugar and 1/4 cup of soy sauce for an Asian-inspired flavor fusion. Rather than using a barbecue rub, season the ribs with garlic and ginger, and when finished, garnish them with sesame seeds and sliced green onions for serving.
- Swap the mustard: Mustard adds acidity which brightens the flavor of the meat. Although these ribs do not taste like mustard, if you don’t like the idea of it, you can choose an alternative such as honey, butter, olive oil, apple cider vinegar, or even a dark-colored soda such as Coke or Dr. Pepper. Each of these options will give the ribs a unique flavor and help the spices to adhere to the meat.

